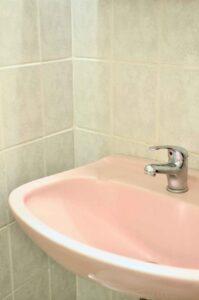
How to fix a leaking tap: Understanding why it happens
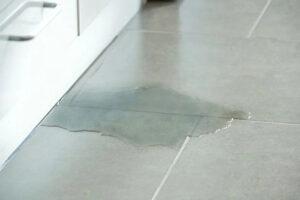
A leaking tap can be a real annoyance. It wastes water, raises your water bill, and can even cause damage if not fixed. Understanding why a tap starts leaking can help you fix it quickly and prevent it from happening again.
Common causes of a leaking tap
1. Worn out washer
One of the most common reasons for a leaking tap is a worn-out washer. The washer is a small rubber or silicone ring that helps seal the tap and prevent water from leaking. Over time, the washer can become stiff, torn, or worn out, causing water to leak from the tap.
2. Loose parts
Another reason for a leaking tap is loose parts. The components inside the tap, such as the washer, O-ring, or valve seat, can become loose over time. This looseness can create gaps where water can escape.
3. Corroded valve seat
The valve seat connects the tap to the spout. If the valve seat becomes corroded, it can cause leaks around the spout area. Corrosion happens due to the buildup of water sediments.
4. Worn-out O-ring
The O-ring is a small rubber ring placed around the stem screw to hold the tap handle in place. Like the washer, the O-ring can wear out or become loose, leading to leaks near the handle.
5. High Water Pressure
High water pressure can also cause a tap to leak. Excessive pressure can wear out the internal parts of the tap faster, causing them to fail and leak.
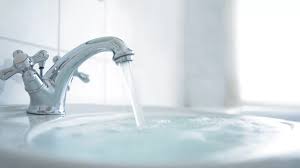
How to Fix a Leaking Tap
Step-by-step guide
1. Turn off the water supply
To start fixing your leaking tap, you need to turn off the water supply. You can usually find the main water valve near your water meter outside the house. Turn the valve clockwise to shut off the water. If you prefer, you can also turn off the valve under the sink. This is typically located in the cabinet directly below the tap. Turn this valve clockwise as well. Shutting off the water prevents any spills and allows you to work without interruptions.
2. Prepare your workspace
Before you start disassembling the tap, prepare your workspace. Lay down a towel or place a basin under the sink to catch any residual water that might spill out. This helps keep your area dry and prevents water damage. Also, clear the area around the tap. Remove any items that might get in the way, like soap dishes or toothbrush holders. This will give you easy access to the tap and make your job simpler.
3. Disassemble the tap
Now, you need to take apart the tap. First, remove any decorative cap on the tap handle if there is one. You might need a flathead screwdriver to gently pry it off. Next, unscrew the handle to expose the internal parts of the tap. Carefully take off the handle, making sure not to lose any small parts. This step allows you to see and access the components that might be causing the leak.
4. Inspect the washer and O-ring
Once the tap is disassembled, look for the washer and O-ring. These are common culprits for leaks. The washer is a small rubber or silicone ring that seals the tap, while the O-ring is another ring that sits around the stem screw. Check these parts for any signs of wear, such as cracks or stiffness. If they look damaged or worn out, they are likely the cause of your leaking tap.
5. Replace the washer and O-ring
If the washer and O-ring are damaged, they need to be replaced. Remove the old washer and O-ring carefully. Take them to your local hardware store to find exact replacements. It’s important to get the right size and type to have a proper fit. Once you have the new parts, install them in place of the old ones. Make sure they fit securely. This will help stop the leak and restore your tap to proper working order.
6. Reassemble the tap
After replacing the washer and O-ring, reassemble the tap. Put the handle back on and screw it in place, following the reverse order of disassembly. Replace any decorative caps you removed earlier. Make sure all parts are tightened properly to avoid causing new leaks. Take your time to make sure everything is correctly aligned and secured. Proper reassembly is important to making sure your tap functions well and doesn’t leak again.
7. Turn the water supply back on
Finally, turn the water supply back on. Slowly turn the valve counterclockwise to restore the flow of water. Check for leaks by turning the tap on and off a few times. Make sure the water flows smoothly and there are no drips. If everything looks good, you’ve successfully fixed your leaking tap. If you notice any issues, double-check your work and make sure all parts are properly installed and tightened.
By following these steps, you can fix a leaking tap and prevent further water waste and damage.
Fixing minor plumbing issues: DIY tips and when to call a pro
We are Illawarra Plumbing & Drainer. We want to help you handle minor plumbing issues yourself, but also know when it’s time to call a professional.
If you need professional plumbing services, you can reach us at 0422289320 or iplumbdrains@gmail.com. We’re here to help!